¶ How to create a Train?
In this documentation, we will show you how to create new trains and how to store them in order to allow the usage of the train in PADME.
¶ General Remarks
Trains are essentially Docker images. This means a wide range of programming languages and frameworks are supported. In the following, a basic understanding of Docker is assumend. A basic introduction of Docker can be found here
To create a new train, you need to create a Dockerfile, describing the build process for the Docker image. We will describe the parts of the Dockerfile that are specific to PADME and the creation of trains.
The following sections teach you how to create this file and adapt it for your train.
¶ Docker instructions
A Dockerfile can include various instructions needed for the image creation. For our purpose mostly the instructions
FROM, RUN, COPY, LABEL, and CMD will be used.
However, these instructions are static and will be executed the same way wherever the Docker container is running. To adapt a Train/Image to a local environment found at a Station, we will use our own environment variables, which will be presented in the following.
¶ Environment Variables
In order to use environment varibales we declare them in the following presented way, which differs from the Docker environment variables declared with the
ENVinstruction.
To allow the configuration of your train docker images, we use our own environment variables, not to be confused with the Docker environment variables declared with the ENV instruction. Whenever a train arrives at a station, values for these variables need to be specified by the station software user. This feature can for example be used to configure connection strings, names of datasets, credentials, etc.
All environment variables supported by the train need to be set via a LABELinstruction combined with the envs metadata. You can see an example of this label in the Dockerfile at the end of this section.
This envs metadata contains a description of the supported environment variables in form of a JSON array. For each environment variable, the following needs to be provided:
{
  "name": "the_name_of_the_variable",
  "type": "number|password|text|url|select",
  "required": true,
  "options": [
    "only needed",
    "when using select"
  ]
}
Environment variables like
namecan not include spaces.
The property name is the name that gets displayed to the station software user. Besides the name, we also support five different types: number, password, text, url, and select. Depending on the type, a different visualization is used in the station software. For example, a password will not be visible in plain text. When using the select type, you can provide the selectable options via the options array. Moreover, it is possible to mark variables as required.
The following image shows an example of how these environment variables will be visualized to a station software user. This example shows the train build by the Dockerfile at the end of this section.

Quotes in an array have to be escaped!
Since the JSON array containing the environment variable descriptions is stored in the Dockerfile as a string, the quotes contained in the array itself need to be escaped. This can be achieved by putting a backslash before every quote. For example “name” would be replaced with \”name\”. This can also be done with many online tools or sed:
echo 'envs=[...]' | sed 's/"/\\"/g'
The following code is an example of a train image using python. The specified environment variables are the ones shown in the picture above.
¶ Template Dockerfile
FROM python:3

WORKDIR /usr/src/app/

#Required env vars
LABEL envs="[{\"name\":\"ADDRESS\",\"type\":\"url\",\"required\":true}, \
{\"name\":\"PORT\",\"type\":\"number\",\"required\":true}, \
{\"name\":\"ALGORITHM_TYPE\",\"type\":\"select\",\"options\":[\"linear\",\"loop\"],\"required\":true},\
{\"name\":\"PASSWORD\",\"type\":\"password\",\"required\":true}, \
{\"name\":\"MESSAGE\",\"type\":\"text\",\"required\":false}]"

# Install all required packages
COPY packages.txt .
RUN pip3 install -r packages.txt

# Copy Source
COPY . .

# Run
CMD [ "python", "main.py" ]
¶ Using environment variables
In the previous section, we discussed how to specify which environment variables are needed for your train. We will now show a small example of how to use these variables.
Since values for the environment variables are specified in the station software when the container for the train is created, we can use the values in the train simply be reading the environment variables during runtime. For example this can be achieved in Python by the following code:
address = str(os.environ['ADDRESS'])
port = str(os.environ['PORT'])
algotype = str(os.environ['ALGORITHM_TYPE'])
password = str(os.environ['PASSWORD'])
¶ Where to store trains
All trains are stored in our Train Depot. This Train Depot is a git repository containing all PADME trains. If you don’t have access yet, please feel free to contact us. For the BETTER Project, use this contact point.
To make a train available in PADME, you simply need to create a new folder in the train depot, containing your code and the Dockerfile described in the previous section.
On every commit to the repository, changed trains will be automatically build and made available in PADME.
The build progress of your train can be monitored via the CI/CD menu in GitLab. Below is an example of a finished build:
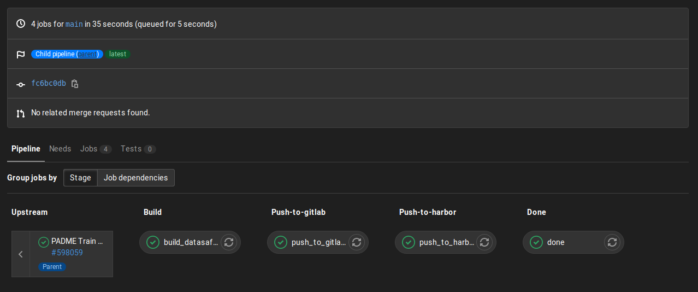
If you need to change your train at a later point in time, simply change the code and docker image, and everything will be rebuild and updated automatically.
Now you are all set for creating trains in PADME. If you have further questions please do not hesitate to contact us. For the BETTER Project, use this contact point.
¶ Train Creator Service
¶ Setting up Train Creator
Before you begin: Make sure you have access to the Train Depot (For RWTH PADME installation this is https://depot.padme-analytics.de and for FIT PADME installation, this is https://depot.pht.fit.fraunhofer.de). You should be able to login to the Gitlab instance and have write access to the two repositories - Padme Train Depot and Padme Federated Train Depot.
- Create a new personal access token with
apiaccess in Train Depot/Gitlab. To do so, go toUser Settings -> Access Tokens -> Personal Access Tokensand add a new token. You may leave out theExpiration datewhich will then default to a token with a validity of 365 days.

- Login to Train Creator Web App (RWTH: https://creator.padme-analytics.de/ or FIT: https://creator.pht.fit.fraunhofer.de/). You should login with the same Keycloak account you use to login to the Train Depot. You’ll be prompted to provide the Gitlab username and access token.
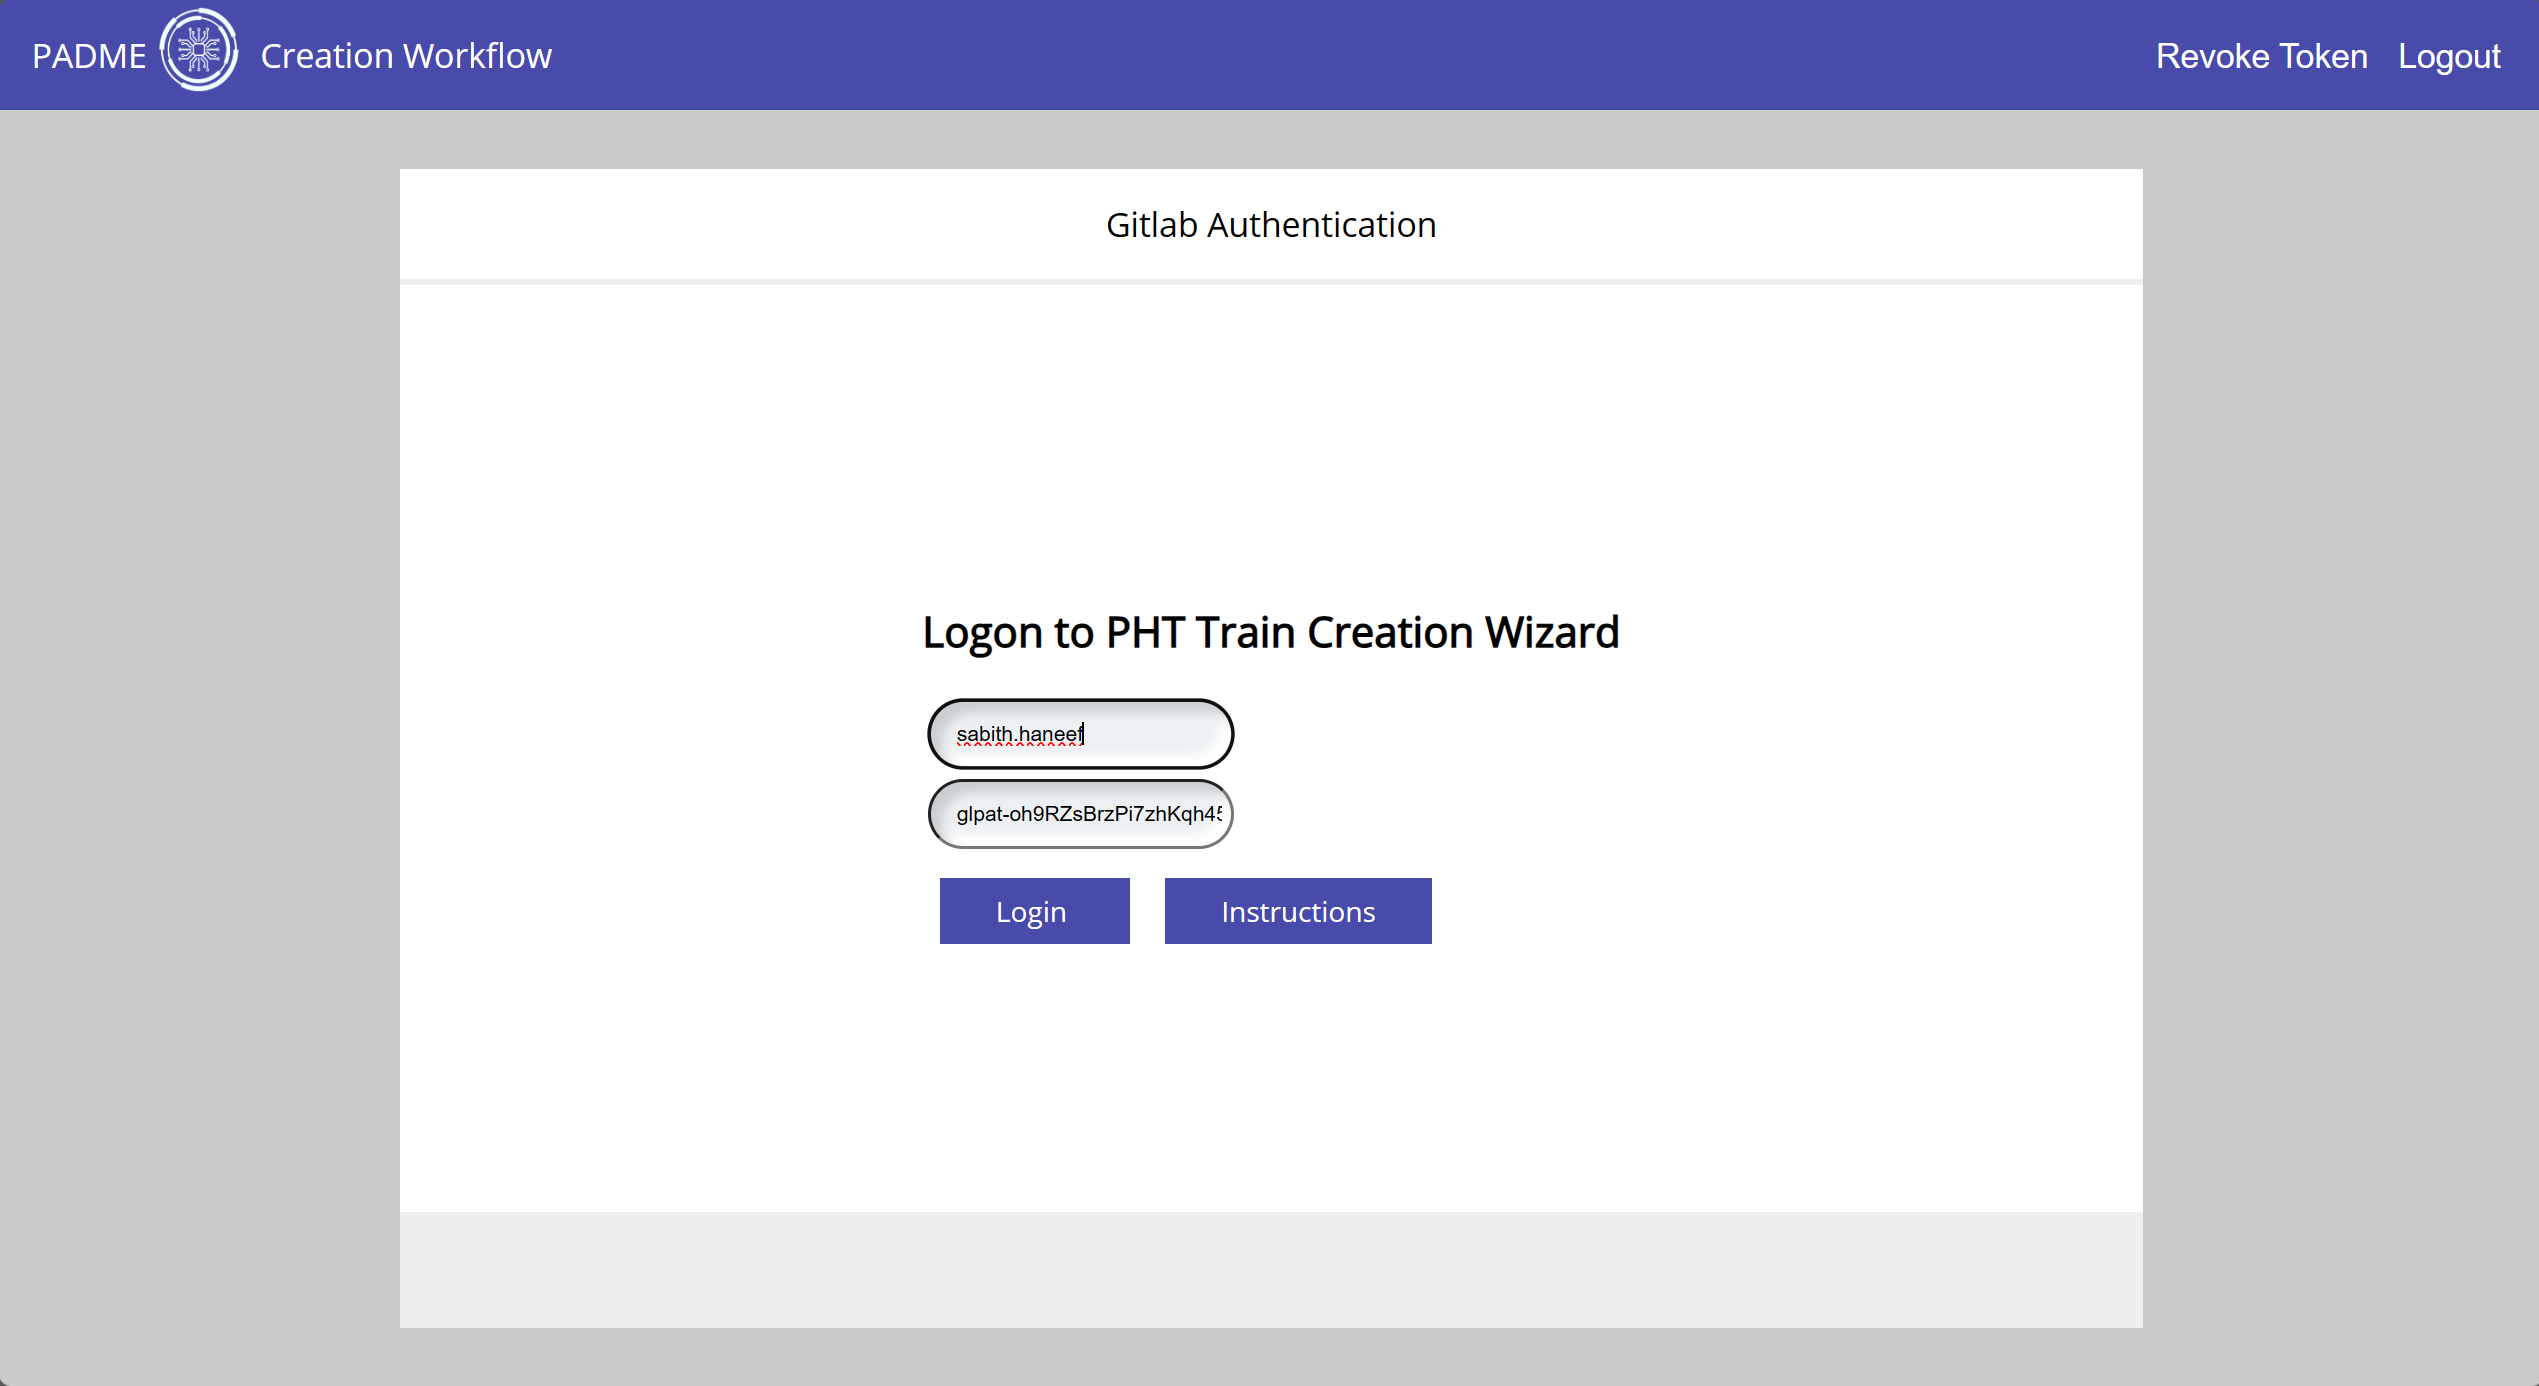
Once you login, these credentials will be stored in vault and you won’t be required to provide these again the next time you login, unless you revoke the token using the button on the top right.
¶ Using Train Creator to Create Trains
If you’ve set up train creator following the above steps, you’ll be able to use it to create and publish trains for use in PADME ecosystem. The train creator is basically just a different way to push code to the Train Depot.
Once you’ve assembled your code as described earlier in this document (i.e., you’ve your code and your Dockerfile), you can use Train Creator to upload this to the Train Depot. Just login in to Train Creator web app and follow the steps in the UI. The steps are also summarized below:
- You’ve the option to push three different types of trains (i.e., containers)
- Incremental Learning - For creating an incremental learning train, i.e., container that will run in the stations in the Incremental version
- Federated Learning - For creating the train that will run in the stations in the Federated Learning version, i.e., the learning part of federated learning
- Federated Aggregation - For creating the train that will run in the central server which will do the aggregation using the local updates from each station.
Note that to run a Federated Learning use-case, you will need both Federated Learning and Federated Aggregation trains for that use-case.
- Once you’ve chosen the option, you will have to upload the analysis task. This can be a zip file if there are multiple files or it can be the single file, for example, a
main.pyfile. - Upload a
requirements.txtfile if you’ve one - Define any connection parameters you may want to document
- Upload your
Dockerfile. You also have the option to create aDockerfilefrom a standard template which you can then modify. - Choose your entrypoint, which will be the
main.pyyou’ve uploaded earlier. - You’ll have the option to edit your Dockerfile if you need to make any changes
- Provide details for your train
- Project Name in Repository - This will be the folder name in the Train Depot repsitory as well as the name of your train. If you’re updating a train, for example, adding aggregation code after you’ve added learning code, make sure the project name is the same as before.
- You also have the ability to push this code to a private repository of your choice instead of the Train Depot. Though if you want this train available in PADME, you will need to push to Official Train Depot.
- Project Description
- Any additional metadata you may want to provide
- Provide Gitlab Access Parameters - only needed if you need to push to private repository. If pushing to official Train Depot, this will be autofilled.
- Verify the details
- Select the branch to push the code to. It is recommended to push to a new branch if this is a new train. You should also provide a commit message.
- Now, Train Creator will push your code to the Train Depot. You will be able to see the commit.
- If you now merge your changes from the branch you created to the
mainbranch in Train Depot, it will kick off the CI/CD pipeline that will build your train. You can do this either directly via Gitlab UI or through the Storehouse App.